Jan 232017
You think you’re warding off disease, but if you don’t spend enough time washing your hands in the correct manner you’re fooling yourself.
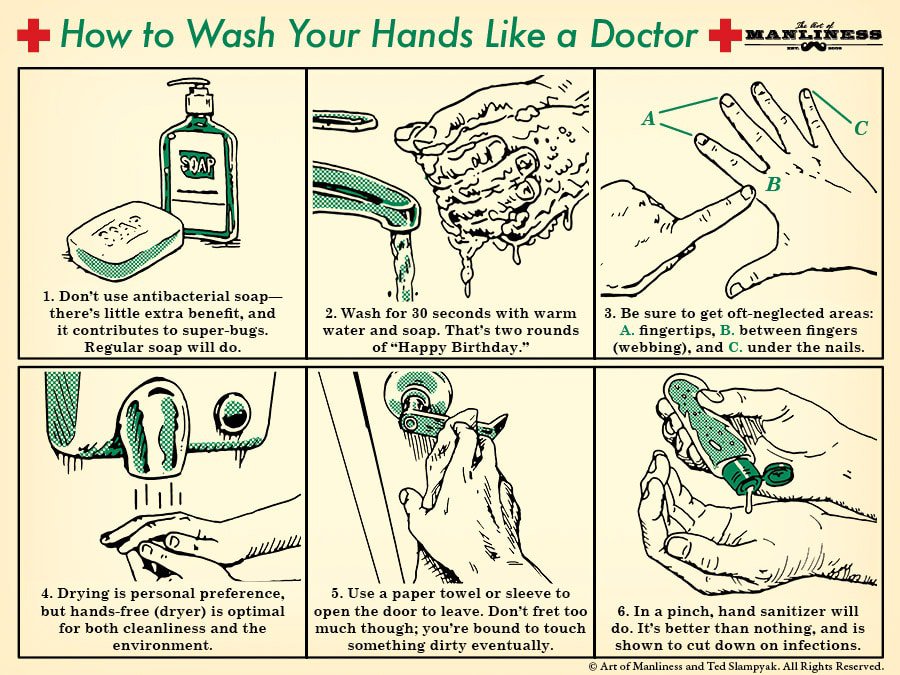
Use the simple guide below to wash your hands like a doctor.
January has been the month of the cold that would not die at the McKay household. First one half of the family got sick, then the other, then the first half again. It was a downright pandemic around here. Productivity, morale, and my gains — my poor, poor gains! — have suffered greatly.
It’s gotten me thinking about how to better handle getting sick in the future, and how to prevent getting sick in the first place. When it comes to the latter, proper and regular hand-washing is one of the most important weapons in your cold and flu-fighting arsenal.
In the past I’ve admittedly been a short and sloppy washer. And I’m not alone; studies have shown that only 5% of people wash their hands correctly.
So we talked to Bryan Canterbury, ER doctor at Newton-Wellesley Hospital in Newton, MA, to get his tips on how to wash thoroughly like a right-old medical professional. His doctor-endorsed guide is above.
According to the CDC, you should wash your hands:
- Before, during, and after preparing food
- Before eating food
- Before and after caring for someone who is sick
- Before and after treating a cut or wound
- After using the toilet
- After changing diapers or cleaning up a child who has used the toilet
- After blowing your nose, coughing, or sneezing
- After touching an animal, animal feed, or animal waste
- After handling pet food or pet treats
- After touching garbage
Skip the antibacterial soap; it’s not only no more effective at getting rid of germs than regular soap, it may lead to the development of resistant strains of bacteria (i.e., the “super bug”). The antibacterial label also tends to make people careless about washing their hands the right way, figuring the soap will take care of the germs itself, which isn’t the case.
Hand sanitizer will work in a pinch — use a big glob, make sure it’s at least 60% alcohol, and rub it over every surface of your hands. Sanitizer’s not a good choice when you’ve got actual grime on your hands, and it doesn’t kill all germs, but it’s almost as effective as hand washing. It won’t lead to super bug-dom, either; hand sanitizer breaks down bacteria in a different way than the anti-microbials in antibacterial soap do. Here’s how Dr. Canterbury recommends using sanitizer:
“In the hospital, we use hand-sanitizer in-out of each patient room. But we are told to soap-and-water after the bathroom and before/after meals and when hands are visibly dirty — and I think that’s great minimum criteria throughout the day no matter your work/life setting; more if possible to prevent catching a cold, flu, pneumonia — or worse.”
There you go, how to wash (or sanitize) your hands like a doc. Until next time, keep your noses, and your hands clean.
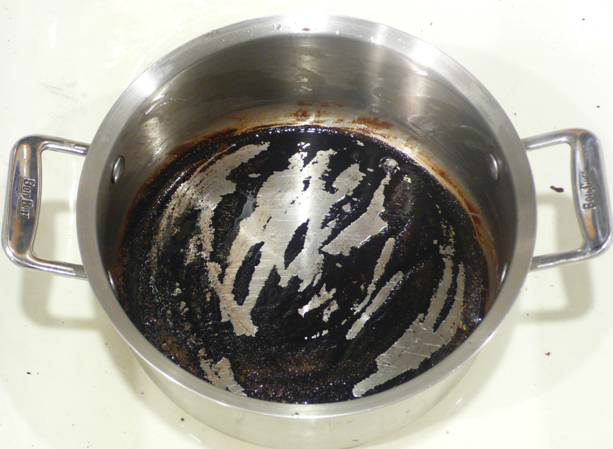
Image Credit: stepbystep.com
We’ve all been there before. While cooking rice or something similar on the stove top, we are distracted just long enough for something we are cooking to get stuck to the bottom of the pot. The resulting layer of blackened food gunk not only causes our home to reek of the evidence, it also creates a difficult situation in terms of cleaning.
Rather than scrubbing the pots incessantly, which can potentially damage them long-term, we suggest trying the following natural and effective method.
Things Required:
– the soiled pot
– baking soda (1/2 cup)
– water
– your stove
– dishwasher detergent
1 Add Water
Add enough water to your pot to cover the burned and stained area. Place on the stove top and set to high. Remember to be careful while working around the stove as you should observe all the necessary safety precautions.
2 Baking Soda
Add a 1/2 cup of baking soda to the pot and bring to a boil. The baking soda will help loosen up the burnt areas on the bottom of the pot. Depending on the size of the pot you may want to add more baking soda for it to be effective.
3 Time Heals
Allow the solution to boil until the blackened and charred stain begins to disappear. Continue boiling until the stained area is completely gone. If some of the stain still remains, move to the next step. Be careful while the water boils as you do not want to get burned.
4 Detergent
Drain the pot and place it in your sink. Add enough dishwasher detergent to cover the remaining stained area. Add 1″ of boiling water and allow the pot to sit overnight.
In the morning, rinse the pot and the remaining stains should be gone with some gentle rubbing. Remember not to scrub too hard as you do not want to damage your pot.
5 Cleaning solutions:
You will also find a wide variety of different cleaning solutions that are designed specifically for the purpose of removing burnt stains from pots. Most of these cleaners are readily available at any convenient store. The basic premise is that you spray the solution on the pot and it will begin to create a thick foam. Then you let it sit for a few minutes. The foam will loosen the burnt out stains and then all you have to do is rinse the pot to clean it. Most of these cleaners do not require any tedious scrubbing.st of these cleaners do not require any tedious scrubbing.
Houshold Hacker is here to help you with a seven handy tips to clean your bathroom.
Enjoy!
Learn 7 awesome life hacks to quickly clean your bathroom, leaving it looking shiny and new! Many common household items can be used to clean up even the worst messes and stains so save your cash.
Some of us use our keyboard each and every day. It’s an essential tool for millions of jobs, but the unassuming keyboard can harbor some nasty, scary, dangerous germs and bacteria. In fact, studies show more than 3,000 organisms occupy every square inch of the average keyboard. Despite all this icky stuff lingering at our fingertips, many of us neglect cleaning the dirt and grime that builds up over time. The following infographic looks into the scary statistics behind keyboard filth plus offers easy and effective ways to keep it clean—and help keep you healthy.
